A Risk-Free Return On Cash: Guide On Why And How To Buy Ibonds - Part 2
Part 1 of this guide can be seen here:
A Risk-Free Return On Cash: Guide On Why And How To Buy Ibonds - Part 1
This guide was split into two parts due to limits on e-mail size, which don’t play well with the volume of images we’re including. We’ll be picking up immediately from where we left off. Steps 1 through 9, along with our reasoning, are included in Part 1.
First Time Logging In
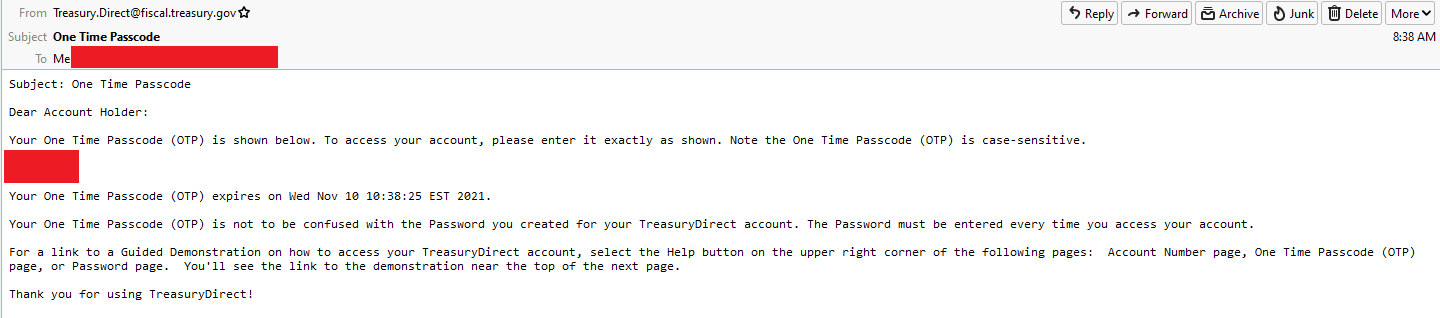
You’ve got your first e-mail. This is the part where I start blocking out personal information.
Step 10: Go find your new email that looks like this:

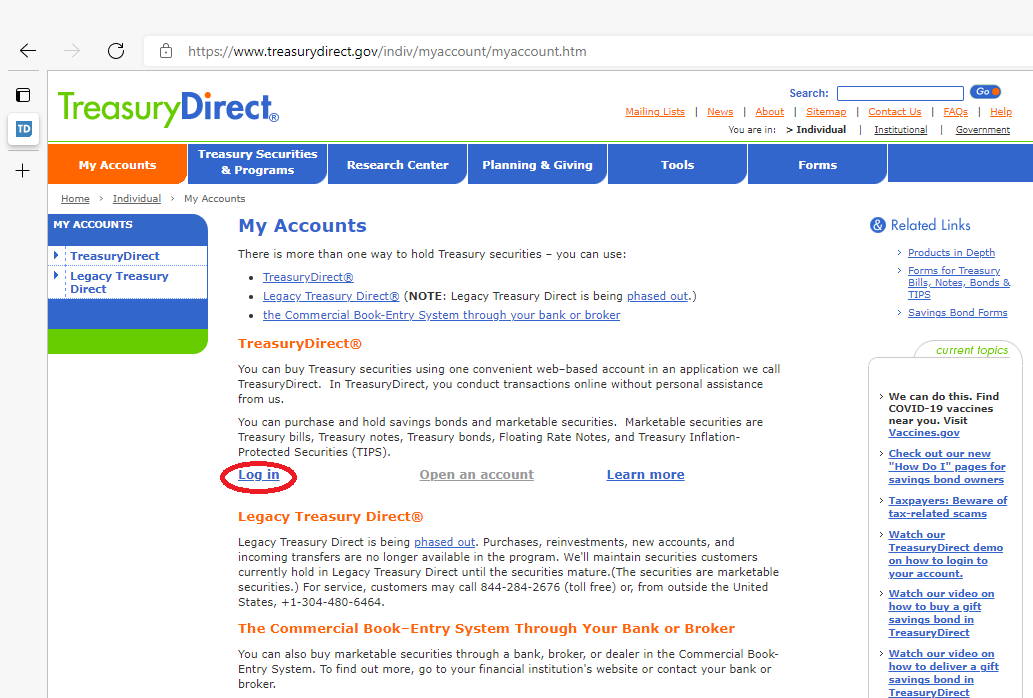
Step 11: Go back to the “My Account” page from step 2 and click “Log in”:
Step 12: Enter your account number from the e-mail and click submit:

Step 13: A One Time Passcode was mailed to you right after you clicked “submit”, even if you were always working from the same machine and browser:
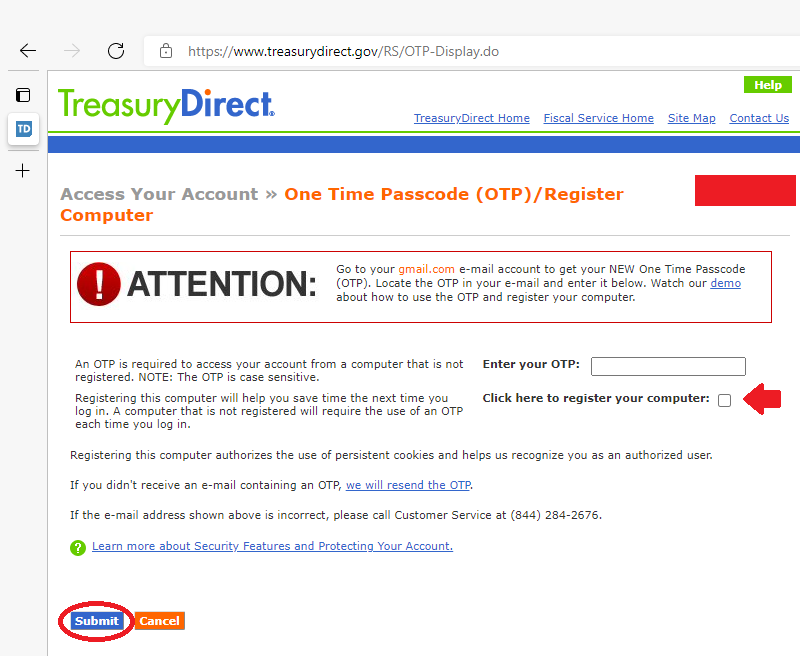
Step 14: Return to your browser and enter the passcode. I like to click the button to “Register your computer” since I’m working from home, then click “submit”:
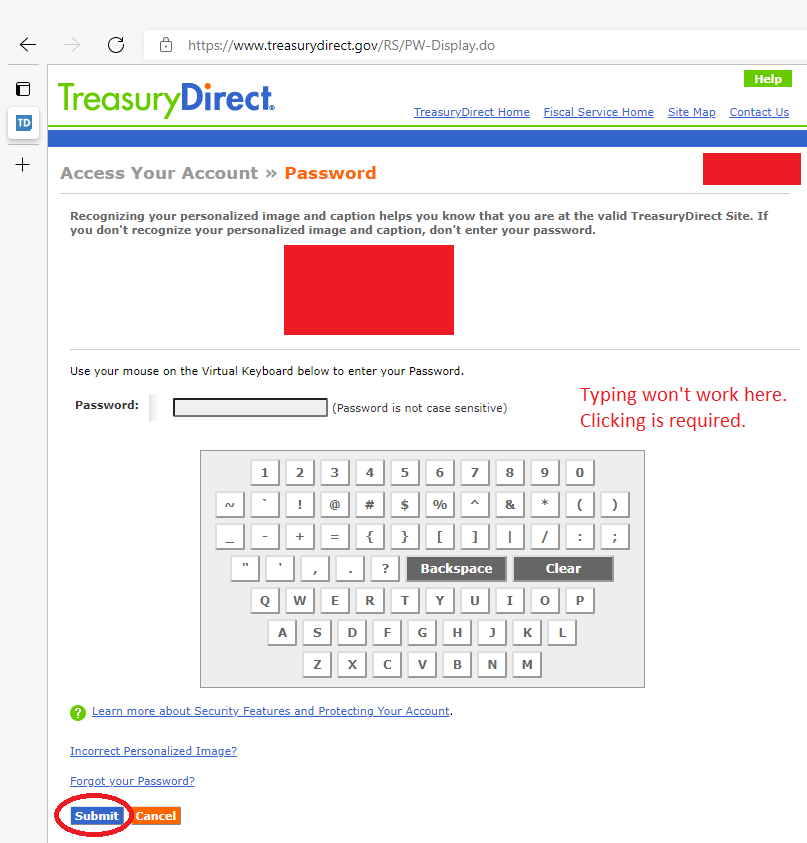
Step 15: Enter your password by clicking into the keyboard. Typing is not allowed:
Buying Your First Series I Savings Bonds
We’re through the first two sections and so far everything feels pretty smooth.
Step 16: Now you’re going to get way too many buttons to choose from, but we want to use “BuyDirect”:
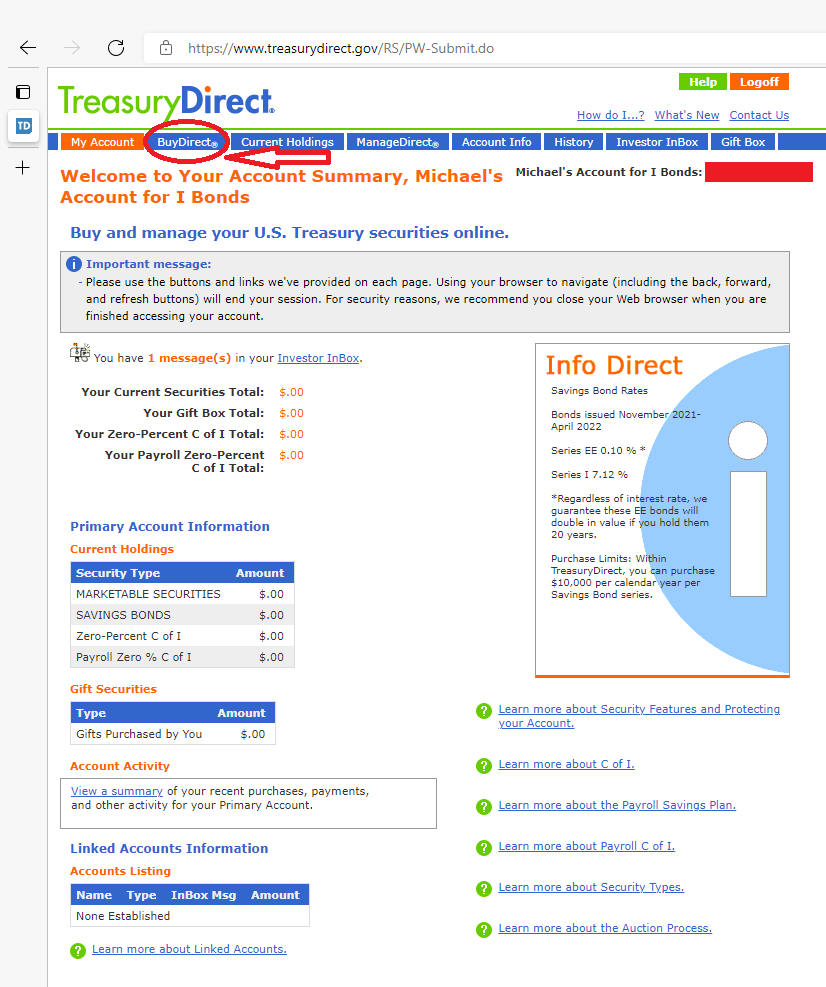
Note: The “Investor Inbox” just had a welcome message linking us to more information about the bonds.
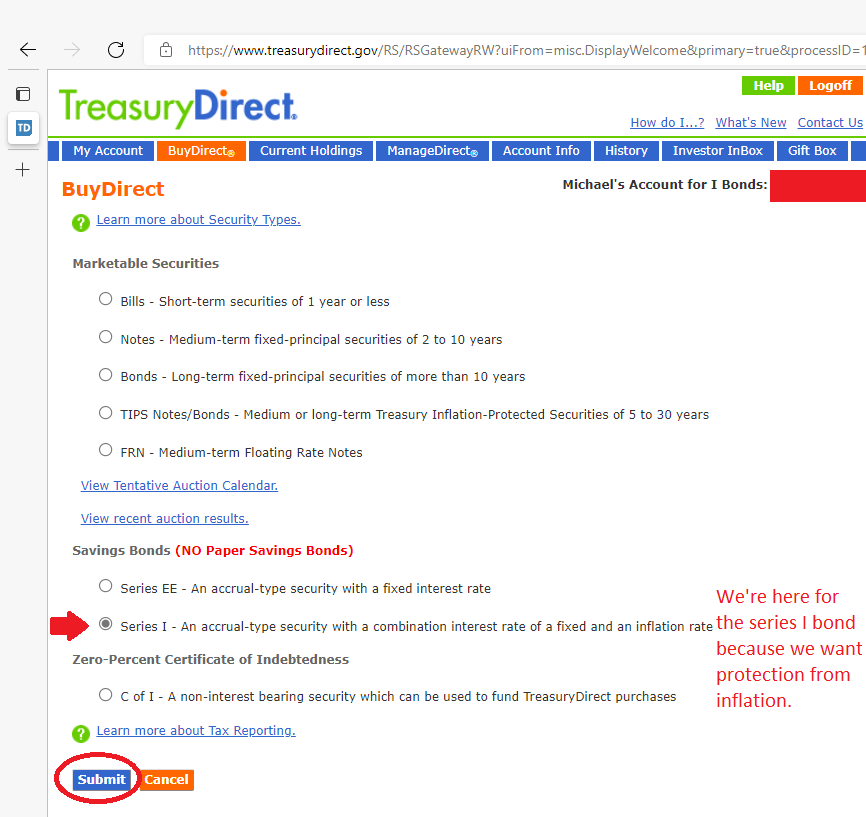
Step 17: Choose “Series I” since this is a guide on how to purchase ibonds. Of course, investors can use the other options at their own discretion:
Step 18: Decide how much you want to invest and how often:
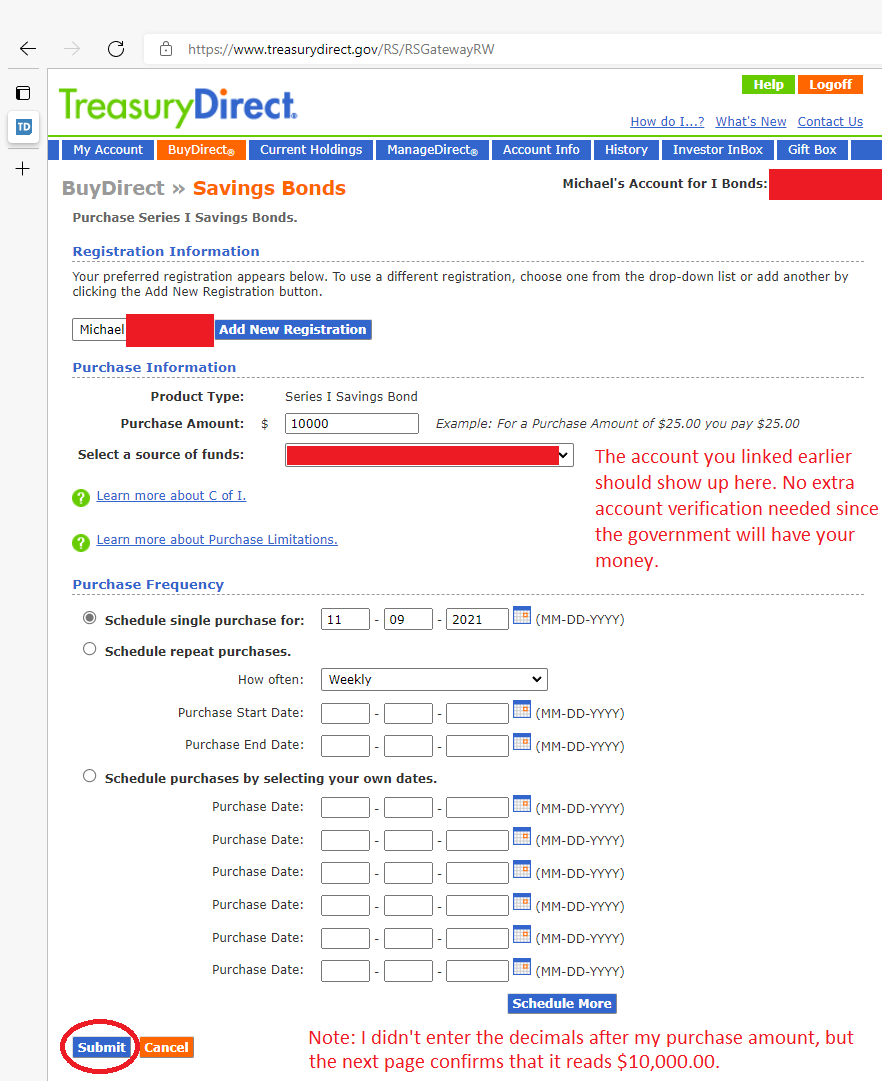
My preference here is simply to put in $10,000 and be done with this account until it is time to do the same thing for 2022. I’ll probably do the transaction for 2022 in January 2022. My wife will still need to prepare an account as well.
Step 19: You’ll get a page to review the transaction you just entered:
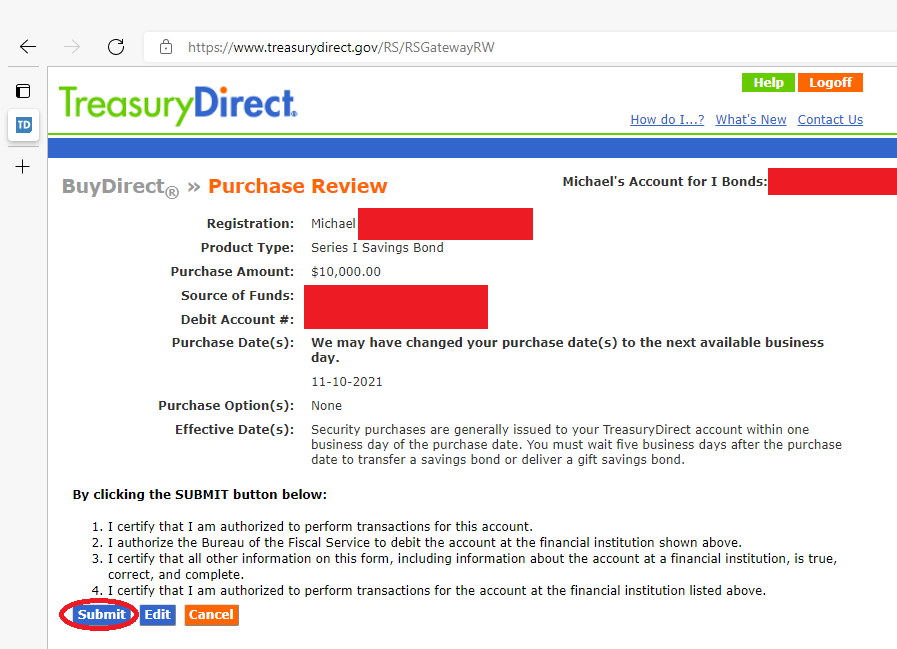
If everything looks good, you can hit the submit button and proceed to the final step.
Step 20: Review the information again. If you want a record, you can print or screenshot the page:
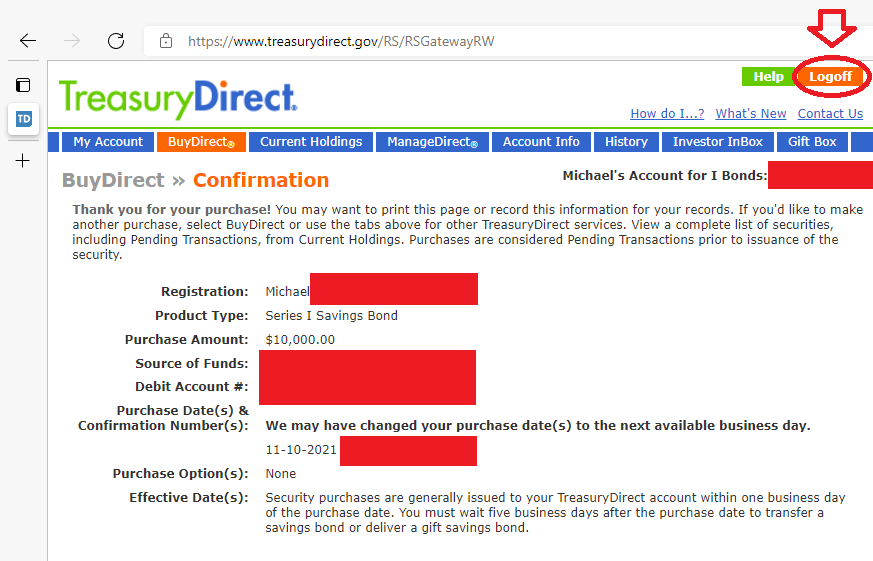
Once you have any records you want, you can hit the “Log off” button. That account is all set for the current calendar year.
Conclusion
Buying ibonds is a great way for people to protect their savings from inflation. It doesn’t need to replace part of the investment portfolio. By utilizing it as part of our cash management technique, we’re able to earn a return on cash that was otherwise idle. Since we aren’t exposed to any decline in the value of the position, it is perfect for anyone who doesn’t mind locking up that capital for one year. The rate is subject to change twice per year, so the future increases in value are not known. However, at the current rate it is paying investors a very respectable return for a risk-free position. For comparison, the 5-year TIPs (Treasury Inflation Protected Security) has a yield of about negative 1.8% to negative 1.9% as of my writing. That makes the return on the ibonds very attractive.
Creating an account is fairly quick. The total process should take less than 20 minutes so long as you have the necessary information with you.
You can pick how much to invest at any time, so investors don’t need to put the full $10,000 in. For those who can afford to, putting in $10,000 for both adults in a household followed by another $10,000 for each adult in early 2022 would result in having $40,000 earning a respectable return. If the rate averaged 7% over the next few years (currently 7.12% but subject to change), that would come out to $2,800 per year for the first $40,000. That’s much better than earning a few dollars from the savings account. This one technique alone will pay several times more than the cost of our service (on Seeking Alpha). Since the investor has the choice to continue earning interest for up to 30 years, that’s a great return on the time spent setting up and funding the account.
Member discussion